Welcome to the Hospital Management System (HMS), an automated database system designed specifically for health care facilities. The HMS was designed to streamline the management of records and schedules necessary for the operation of a state of the art health care facility.
The HMS was designed to be easy to use. As it is assumed that many potential users may not have extensive background with computers, ease of use enables the existing staff to begin using the system with little additional training.
A key advantage of the HMS is the standardization and amalgamation of all hospital data stores. The HMS by doing so, will significantly lower the incidence of missing, non-current or incorrect data in the stores. Also, consolidating data stores into one central location ensures the integrity of all data and provides a database facility for future statistical and management reporting.
A key goal of the HMS is to reduce the time spent by staff filling out forms thus freeing up valuable human resources for other important tasks (such as immediate dismissal). Another key goal of the HMS is to increase error checking to reduce the incidence of errors in staff scheduling. This feature will enable the creation of accurate, error free schedules thus reducing the amount of time spent by administration creating and publishing schedules.
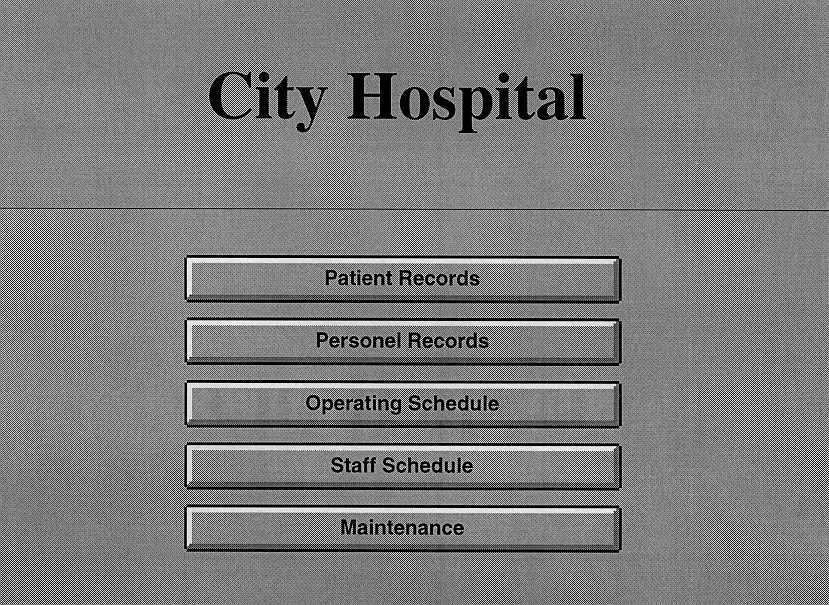
To enable the HMS system, double click the HMS icon from the Windows desktop. The user will then notice the Microsoft Access logo appears during the boot sequence. This is unavoidable; they have to advertise somewhere!! After a short period, the HMS main menu screen will appear (please refer to the figure below) and the user main begin a joyous session with this premium software.
By clicking on the applicable button, the HMS will then bring up the desired working screen. The various working screens enable the user to view and/or manipulate information as required. The working screens would include the patient information screen, the staff information screen, the operation scheduling screen, the staff scheduling screen and the maintenance function screen. Each screen deals with a related group of tasks organized for the user's convenience.
The HMS was designed with a graphical user interface that utilizes both the keyboard and the mouse for input. A graphical user interface was chosen that is very close in appearance and function to that currently found on the Microsoft Windows operating system. This type of interface was chosen as it is typically very easy for inexperienced users to learn and utilize. As a key design consideration was ease of use, this type of graphical interface was deemed to be advantageous.
The various working screens can be viewed as being divided into 3 major sections; the text boxes (such as specialty, title, first name and such), the function boxes (such as add/new, edit, etc...) and the list box (the text box at the bottom of the screen that displays relevant information). The text boxes are used to to input/edit specific information for a search of the database. Once a particular record is selected, the information is displayed in the text boxes. The user may then edit/view this information as required.
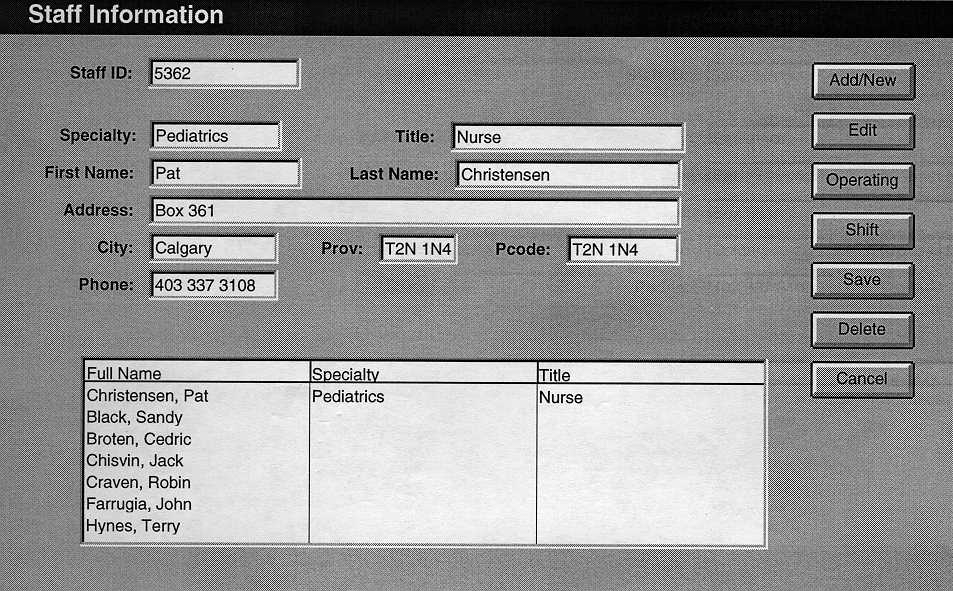
The function buttons on the right side the working screen (refer to the above figure) enable the user to invoke certain edit and view functions. For example, if the user wishes to edit the displayed information (for the purpose of updating staff information), the 'EDIT; button would be clicked using either the mouse or the appropriate shortcut key (more on these later).
The list box which appears on the bottom of the screen is used to display the results of an interactive search. This element is a scrollable listing that enables easy selection of particular records. Two scroll arrows are available on the side of the scroll box; they can be used if the information list exceeds the size of the list box.
The HMS enables easy retrieval of information using progressive searches of the database information. For example, if the user wished to retrieve information regarding a certain staff member but could not remember the correct spelling of that individual's name, the user could enter the staff member's specialty and first name and the list box would display all staff members for which a match occurred. The user could then select the appropriate staff record [from the list box at the bottom of the screen] and view or edit the information as required.
Interactive searching of database information will, in theory, enable the user to quickly retrieve a specific record when only partial information is known (such as patient name). This function has been implemented to provide ease of use and flexibility for users of all experience levels.
Certain text boxes have pull-down menus that enable easy selection of information. A pull-down menu is a listing of options that remains hidden until the user desires to view that information. For example, referring to the above figure of the staff information screen, the 'Title' text box would have a hidden pull-down menu that when activated, would display the three possible entries this field could contain (doctor, nurse or supervising nurse). The user may then select a particular entry by clicking on it with the left mouse button. This feature facilitates easy entry of information and reduces the number of things the user has to remember when using the HMS; this will result in happy users.
The user may utilize both the keyboard and the mouse to control the HMS. Generally, the mouse is used to click function buttons (found on the right side of most screens - please see the figure below) and to select a particular text box for input or editing, or to scroll up and down in the list windows. The keyboard is used primarily for the input of alphanumeric information and to jump from one input box to the next.
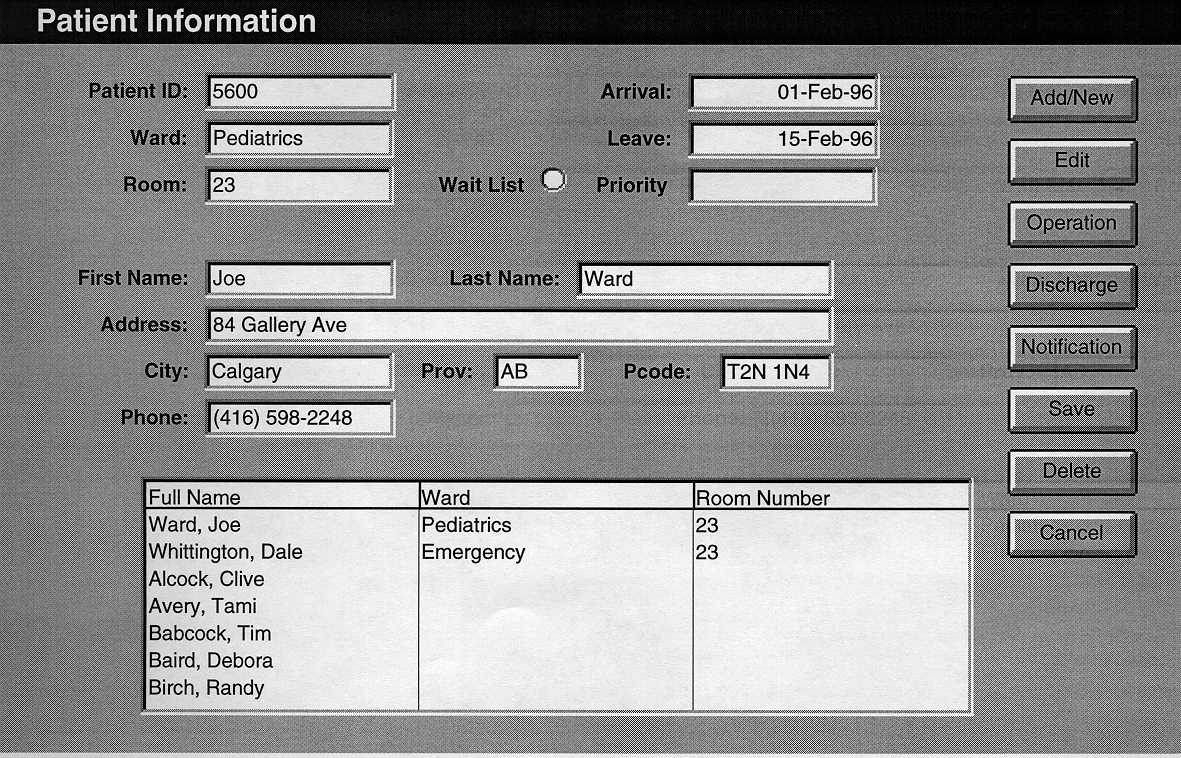
The mouse is used primarily to maneuver the various screens in the HMS. The mouse is most often used as a point and click device to select specific text boxes for input/editing or to activate a function button. For example, in the patient information screen (please refer to the figure below), the function buttons on the right side of the screen (add/new, edit, etc...) can be activated by using the mouse to place the pointer on the button and then single clicking the left mouse button.
Also, the user may select a specific text box (such as patient ID or ward) by clicking the left mouse button while the mouse pointer is inside the particular box. Selecting a text box in this fashion will allow the user to then input/edit information in that box.
Another important function of the mouse is to scroll the information displayed in the list box during interactive searches. Scrolling information in the list box is performed by clicking on the applicable scroll arrow on the list box. Once the desired record has been located in the list box, the user may then use the mouse to select the record by placing the pointer on the record line and single clicking the left mouse button.
Pull-down menus may also be activated using the mouse. By clicking on a particular text box title (such as ward or room) with the left mouse button, the desired pull-down menu will be enabled.
The keyboard is primarily intended to be used to input alphanumeric information in the various text boxes. Once the desired text box has been selected, the user may then input information using the keyboard.
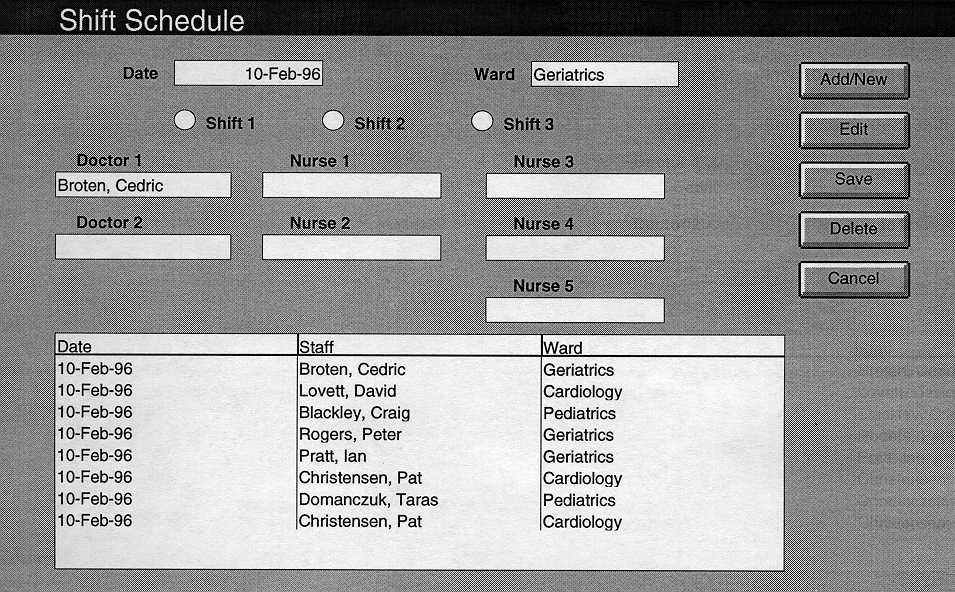
The keyboard may also be used to navigate the various working screens. The user may toggle from one text box to the next by hitting either the 'ENTER' or 'TAB' key. Also, the left and right arrow keys may be used to move amongst the text boxes. For example, in the shift schedule screen (refer to the figure below), if the user was entering the Nurse 2, they could move to the next text box (in this case the Nurse 3 box) box hitting ENTER or TAB or the right arrow; or they could move to the previous text box (in this case Nurse 1) by hitting the left arrow or shift-TAB key.
It should be noted that the user may navigate the working screens using either the mouse or the keyboard or both to select a given field; there are no constraints upon the method chosen here. It should also be noted that the keyboard can be used as a convenient place to rest one's hands while taking a quick nap.
Next Section
Back to the User Manual titlepage
Back to the main page