Scenario #1:
Joe comes into the hospital complaining of a stomach ache and wants
to make an appointment to see a doctor. He has never been in before and
therefore must be added as a new patient. Once he has been added into the
database, the secretary schedules an appointment for him that day. During
the appointment, the doctor concluded that Joe had appendicitis and would
need to schedule an operation. Joe goes back down to the nursing station
to schedule an operation.

Add Joe as a new patient:
- From the main menu, select Schedule a Patient.
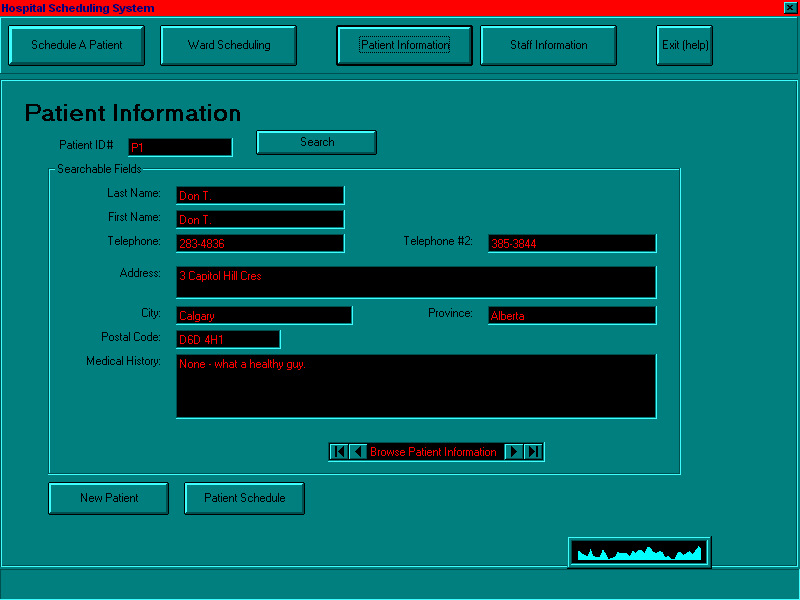
- From the Patient Schedule menu, select New Patient.This will
bring up the Patient Information screen above.
- Enter in all patient information by clicking the mouse in each field
or using the TAB key. If you have made a mistake, simply
click on the field and retype the information, or select New to
start over.
- Once the information has been correctly entered in, select Save
to add the patient, or Cancel to cancel adding a new patient.
This will return to the Patient Schedule menu. Notice that a patient ID
has been created for the new patient.

Schedule Joe's appointment:
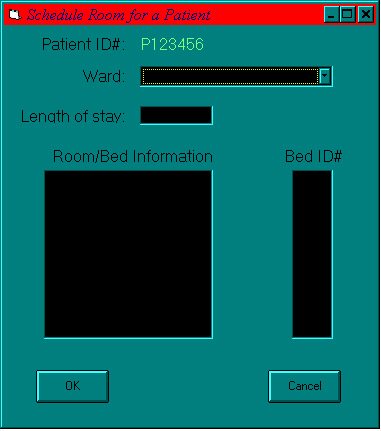
- From the Patient Schedule menu, select Schedule Room.
- From the Schedule Room menu, select a ward by clicking with your mouse
on the drop down arrow of the Ward field.
- Enter the estimated duration of the appointment in the Length of
Stay field by clicking on the box and entering the value in minutes.
- Select a room by clicking on a room in the Room/Bed Information
box, and a bed by clicking on a bed ID in the Bed ID# box.
- Select OK to schedule the appointment, or Cancel if you
want to cancel the scheduling. Notice the appointment has been entered
into the patient schedule on the Patient Schedule menu.

Schedule Joe's operation:
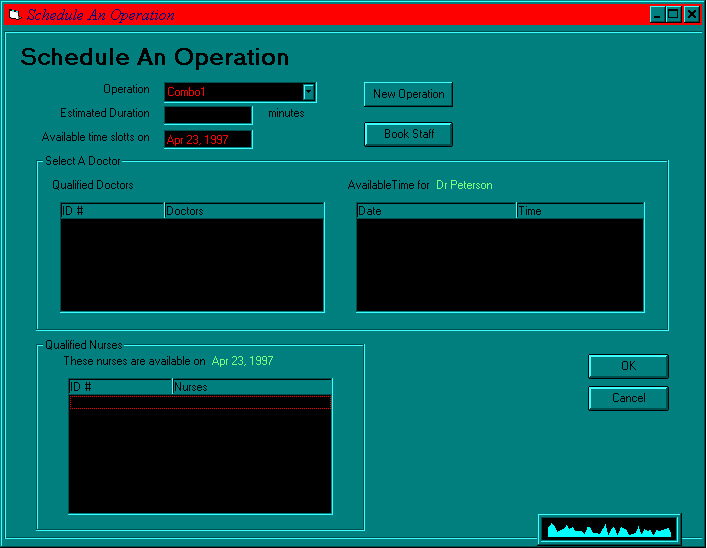
- From the Patient Schedule menu, select Schedule O.R.
- From the Schedule Operation menu, select the operation type by clicking
on the drop down arrow by the field Operation and clicking on an
operation type. If the type of operation does not exist, you can add a
new operation by selecting New Operation.
- A default value will appear in the Estimated Duration field.
If you wish to change it, enter the estimated duration by clicking on the
Estimated Duration box and typing in the duration in minutes.
- Enter the date by clicking on the Available Time Slots on box
and typing in month, day, year.
- Select a doctor or doctors by clicking on the name of the doctor in
the Qualified Doctors box.
- Once a doctor has been selected, a list of available dates and times
will appear in the Available Times box. If there are no times displayed
then the doctor selected has no available times for that day, so you must
select a different doctor or enter a different date. Select a time by clicking
on the desired choice in the Available Times box.
- Select one or more nurses by clicking on the names in the Qualified
Nurses box.
- Select OK to schedule the operation or Cancel to cancel
the scheduling. Notice the operation has been entered into the patient
schedule on the Patient Schedule menu.
ISIS has done an exceptional job in this
area. The steps are easy enough to understand and follow. The screenshots
do not reflect everything that the document describes but this is only
a minor point, given the time constraint that ISIS has faced. It'd be great
if ISIS could keep the format of the user documentation consistent, for
instance, the first two tasks use the numeric format but the last one doesn't.
Again though, these are just minor points, and the document is great.