Overall
Design Document Department of Computer
Science Page maintainer: Terrence
Asgar-Deen |
Many of the following sections are repetitive for two reasons: to make the document as clear as possible and to allow the reader to skip sections.
The entire program is based around a single window. A single window provides a constant frame for the rest of the system. This window is a standard Windows 95 application window. The window has the standard title bar, with the control box, minimize, maximize and close buttons. The border is resizable, and the contents of the window resize gracefully when the window itself is resized. Within the window there are several components that have become standard in Windows 95 applications. The menu bar, toolbar and status bar are all described below. This leaves the main area of the application window, this is the "work area" in which the major functionality is displayed. The work area will display one of the following areas of the system: Customers Area, Products Area, Purchase Orders Area, and Salesperson Areas. Navigation between these areas can be accomplished in three ways: using the View menu, the toolbar, or the navigation buttons in the upper right corner of the work area. Each of these areas are described in detail later in this document.

This will soon include a Change Password option as well.
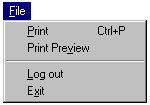
The Print and Print Preview menu items generate reports based on what the user is currently viewing.
The Log out menu item will log the user off the system, causing the Login Dialog to be displayed.
The Exit menu item logs the current user off the system and closes the application.
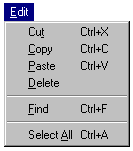
The Cut, Copy, Delete, Paste menu items perform the standard functions in editable fields.
The Find menu item opens the Find dialog, allowing the user to search a particular list.
The Select All menu item will select all rows in a list.
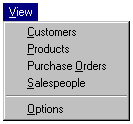
The Customers menu item displays the Customers Area in the work area.
The Products menu item displays the Products Area in the work area.
The Purchase Orders menu item displays the Purchase Orders Area in the work area.
The Salespeople menu item displays the Salespeople Area in the work area.
The Options menu item opens the Options dialog where various system settings can be changed.

The Item menu is used to manipulate records in the Customer, Product, Purchase Order, and Salesperson lists. Only a brief general description is described here, see the sections pertaining to each work area for more detailed information.
The Add menu item displays a dialog where the user can enter information to add a new record
The Modify menu item displays a dialog where the user can change information to an existing record.
The Delete menu item will "delete" a record.
The View Details menu item will display a selected record in more detail.
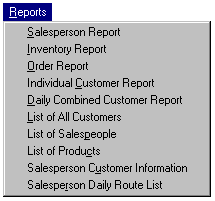
The Reports menu lists several predefined reports. Selecting a menu item will display a preview of the report with the option of printing it.
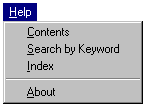
The Contents menu item will display the contents of the system's on-line help.
The Search by Keyword menu item will allow the user to search the on-line help
The Index menu item will display the index of the system's on-line help.
The About menu item will display the opening splash screen with the system's version number.
The toolbar is not discussed in great detail. All buttons that can appear in the toolbar correspond directly with menu items. No extra functionality is introduced by the toolbar. The toolbar can be customized by selecting the Options menu item from the View menu. This feature is not planned for the prototype.
The status bar resides at the bottom of the window and usually displays information on the status of operations. When a menu item is highlighted, the status bar will provide a brief description of the command. On the far right of the status bar, the name of current user will be displayed.
The Customer Area is entered by clicking the Customer navigation button in the work area, selecting Customers from the View menu, or clicking the Customers button on the toolbar if it so configured.
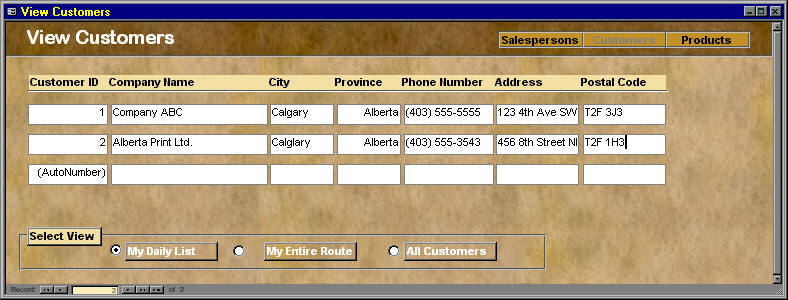
The Customer Area allows the user to view a list of customers. Each customer is displayed on a single line and a scroll bar to the right allows the user to scroll the list up and down. By clicking on a customer in the list, the customer becomes selected and further actions can be taken on the customer. Double-clicking on a customer is the same as selecting View Details from the View menu as described in the next paragraph.
The Select View buttons at the bottom allows the user to change which customers are viewed. The first button displays the route for the current day. If the user is a salesperson, a list of customers to be visited is determined, and only those customers are displayed in the list. If an administrator clicks this button, the user is prompted for a salesperson, and then the route for the specified salesperson is displayed in the list. The second button displays all the customers assigned to a salesperson. If the user is an administrator, the user is prompted for a salesperson. The third button displays all customers in the system and is only accessible by administrators, salespeople will find the button greyed.
To the left of the list are an up button and a down button. These buttons will move a selected customer up or down in the list, allowing the user to change the order of the list. Since the order of customers is only saved when viewing the list of customers for a salesperson, changing the order while in one of the other two views (daily route list, and master customer list) will be temporary.
In the View menu, the Edit menu item will open the "Modify Customer Dialog" with the currently selected customer. In the View menu, the Delete menu item will first confirm the delete operation with a small dialog. If the user agrees, the currently selected customer will be "deleted" and removed from the list. The customer is not actually deleted, but simply removed from normal operation of the system. In the future, features may be added to manipulate these "deleted" customers. Also in the View menu, the View Details menu item opens the "View Customer Details" dialog. This dialog simply displays all the information related to the selected customer. Lastly, in the View menu, the Add item opens the "Add New Customer" dialog allowing the user to add a new customer.
The Print menu item in the File menu will open the standard windows print dialog allowing the user to select various printer options. Clicking Ok will print a report listing all the customers currently in the list. The Print Preview menu item in the File menu will display a preview of the report before it is printed.
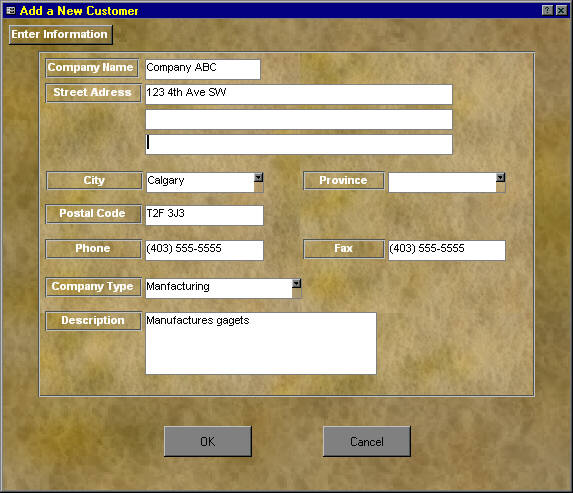
When the Add New Customer dialog is opened, the user is presented with a screen containing fields to enter the new information about the customer. Clicking Ok will ensure all fields are valid, and if so, add the customer to the system. The user can click Cancel at any time to discard the new customer. After clicking either button, the user will be returned to the Customer Area. Salespeople are allowed access to this dialog.
The ID for the customer will be automatically generated. The territory must be assigned explicitly for each customer in a drop down list (this is not yet in the interface). The salesperson can be changed by selecting a new salesperson in the drop down list.

When the Modify Customer dialog is opened, the user is presented with a screen containing the customer's current information. Clicking Ok will make sure all fields are valid, and if so, update the customer in the system. The user can click Cancel at any time to discard the changes. After clicking either button, the user will be returned to the Customer Area. Salespeople are allowed access to this dialog.
The View Customer Details displays all the customer's information. None of the fields are editable. Additionally, the customer's recent purchase history is display at the bottom. This history is not editable. Since this information is displayed in the work area, all the menu commands are available. The Print and Print Preview menu items in the File menu will print a report containing all the details for the current customer. The Edit and Delete menu items in the Items menu will open the "Modify Customer Dialog" and delete the customer respectively. The only button, "Back to Customers" returns the user to the Customers Area. Salespeople have access to this dialog.
The Salespeople Area is entered by clicking the Salespeople navigation button in the work area, selecting Salespeople from the View menu, or clicking the salesperson button on the toolbar if it so configured. Only administrators are allowed access to this area. The Salesperson Area allows the user to view a list of salespeople. Each salesperson is displayed on a single line and a scroll bar to the right allows the user to scroll the list up and down. By clicking on a salesperson in the list, the salesperson becomes selected and further actions can be taken on the salesperson. Double-clicking on a salesperson is the same as selecting View Details from the View menu as described in the next paragraph.
In the View menu, the Edit menu item will open the "Modify Salesperson Dialog" with the currently selected salesperson. In the View menu, the Delete menu item will first confirm the delete operation with a small dialog. If the user agrees, the currently selected salesperson will be "deleted" and removed from the list. The salesperson is not actually deleted, but simply removed from normal operation of the system. In the future, features may be added to manipulate these "deleted" salespeople. Also in the View menu, the View Details menu item opens the "View Salesperson Details" dialog. This dialog simply displays all the information related to the selected salesperson. Lastly, in the View menu, the Add item opens the "Add New Salesperson" dialog allowing the user to add a new salesperson.
The Print menu item in the File menu will open the standard windows print dialog allowing the user to select various printer options. Clicking Ok will print a report listing all the salespersons currently in the list. The Print Preview menu item in the File menu, will display a preview of the report before it is printed.
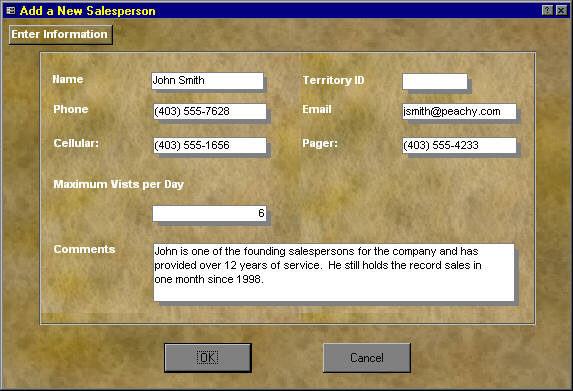
When the Add New Salesperson dialog is opened, the user is presented with a screen containing fields to enter the new information about the salesperson. Clicking Ok, will make sure all fields are valid, and if so, add the salesperson to the system. The user can click Cancel at any time to discard the new salesperson. After clicking either button, the user will be returned to the Salespeople Area. Salespeople are not allowed in the Salespeople Area, therefore they do not have access to this dialog.
The ID for the salesperson will be automatically generated.
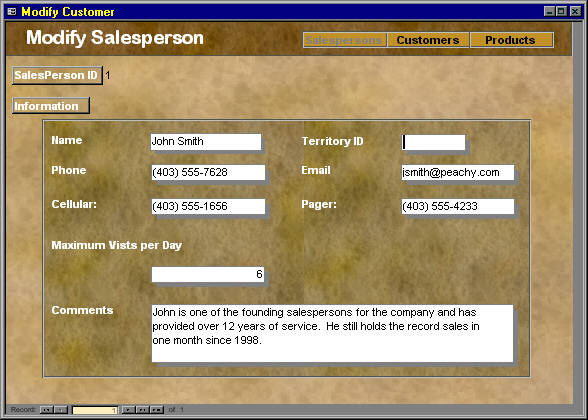
When the Modify Salesperson dialog is opened, the user is presented with a screen containing the salesperson's current information. Clicking Ok will make sure all fields are valid, and if so, update the salesperson in the system. The user can click Cancel at any time to discard the changes. After clicking either button, the user will be returned to the Salespeople Area. Salespeople are not allowed in the Salespeople Area, therefore they do not have access to this dialog.
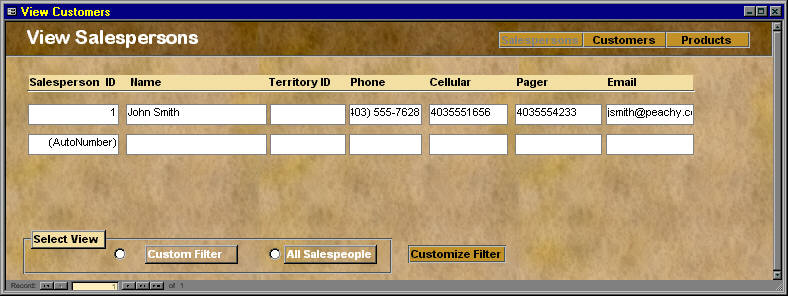
The View Salesperson Details dialog displays all the salesperson's information. None of the fields are editable. Additionally, the salesperson's list of customers is display at the bottom. This list is also not editable. Since this information is displayed in the work area, all the menu commands are still available. The Print and Print Preview menu items in the File menu, will print a report containing all the details for the current salesperson. The Edit and Delete menu items in the Items menu, will open the "Modify Salesperson Dialog" and delete the salesperson respectively. The only button, "Back to Salespeople" returns the user to the Salespeople Area. Salespeople are not allowed in the Salespeople Area, therefore they do not have access to this dialog.
The Product Area is entered by clicking the Product navigation button in the work area, selecting Products from the View menu, or clicking the products button on the toolbar if it so configured. The Product Area allows the user to view a list of products. Each product is displayed on a single line and a scroll bar to the right allows the user to scroll the list up and down. By clicking on a product in the list, the product becomes selected and further actions can be taken on the product. Double-clicking on a product is the same as selecting View Details from the View menu as described in the next paragraph.
In the View menu, the Edit menu item will open the "Modify Product Dialog" with the currently selected product. In the View menu, the Delete menu item will first confirm the delete operation with a small dialog. If the user agrees, the current selected product will be "deleted" and removed from the list. The product is not actually deleted, but simply removed from normal operation of the system. In the future, features may be added to manipulate these "deleted" products. Also in the View menu, the View Details menu item opens the "View Product Details" dialog. This dialog simply displays all the information related to the selected product. Lastly, in the View menu, the Add item open the "Add New Product" dialog, allowing the user to add a new product. Salespeople only have access to the View Details menu item.
The Print menu item in the File menu will open the standard windows print dialog allowing the user to select various printer options. Clicking Ok will print a report listing all the products currently in the list. The Print Preview menu item in the File menu will display a preview of the report before it is printed.
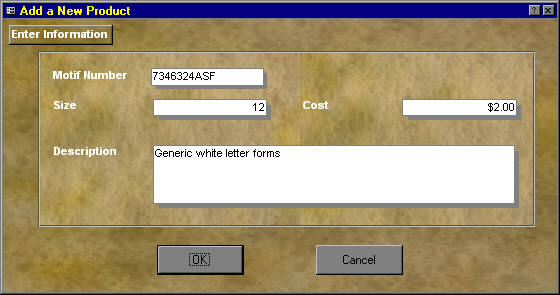
When the Add New Product dialog is opened, the user is presented with a screen containing fields to enter the information about the new product. Clicking Ok will make sure all fields are valid, and if so, add the product to the system. The user can click Cancel at any time to discard the new product. After clicking either button, the user will be returned to the Products Area. Salespeople are not allowed access to this dialog.
The ID for the product will be automatically generated.
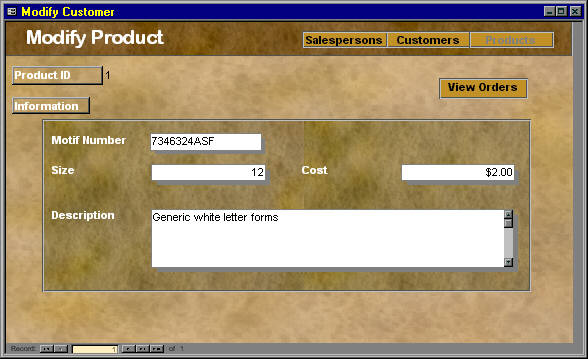
When the Modify Product dialog is opened, the user is presented with a screen containing the product's current information. Clicking Ok will make sure all fields are valid, and if so, update the product in the system. The user can click Cancel at any time to discard the changes. After clicking either button, the user will be returned to the Products Area. Salespeople are not allowed access to this dialog.
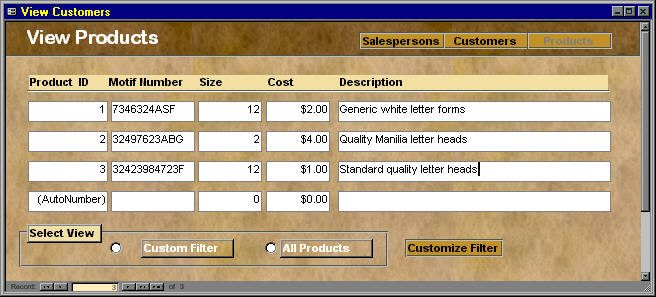
The View Product Details dialog displays all the product's information. None of the fields are editable. Additionally, a list of customers who have recently purchased the product is displayed at the bottom. This list is not editable as well. Since this information is displayed in the work area, all the menu commands are still available. The Print and Print Preview menu items in the File menu will print a report containing all the details for the current product. The Edit and Delete menu items in the Items menu will open the "Modify Product Dialog" and delete the product respectively. The only button, "Back to Products", returns the user to the Products Area. Salespeople have access to this dialog.
The Purchase Order Area is entered by clicking the Purchase Order navigation button in the work area, selecting Purchase Orders from the View menu, or clicking the purchase orders button on the toolbar if it so configured. The Purchase Order Area allows the user to view a list of purchase orders. Only purchases placed by the salesperson will be displayed. Each purchase order is displayed on a single line and a scroll bar to the right allows the user to scroll the list up and down. By clicking on a purchase order in the list, the purchase order becomes selected and further actions can be taken on the purchase order. Double-clicking on a purchase order is the same as selecting View Details from the View menu as described in the next paragraph.
In the View menu, the Delete menu item will first confirm the delete operation with a small dialog. If the user agrees, the currently selected purchase order will be "deleted" and removed from the list. The purchase order is not actually deleted, but simply removed from normal operation of the system. In the future, features may be added to manipulate these "deleted" purchase orders. Only administrators have access to the delete function. Also in the View menu, the View Details menu item opens the "View Purchase Order Details" dialog. This dialog simply displays all the information related to the selected purchase order. Lastly, in the View menu, the Add item opens the "Add New Purchase Order" dialog, allowing the user to add a new purchase order.
The Print menu item in the File menu will open the standard windows print dialog allowing the user to select various printer options. Clicking Ok will print a report listing all the purchase orders currently in the list. The Print Preview menu item in the File menu will display a preview of the report before it is printed.
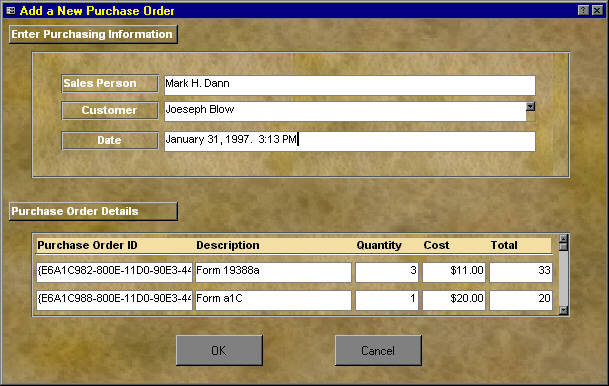
When the Add New Product dialog is opened, the user is presented with a screen containing fields to enter the information about the new order. At the bottom of the dialog is a grid to add the products for the order. A product can be added by simply clicking on an empty row. A product can be identified by either entering its Product code, or by selecting the description for the drop down list. Clicking Ok will make sure all fields are valid, then confirm the new order with the user, and last, add the order to the system. The user can click Cancel at any time to discard the new order. After clicking either button, the user will be returned to the Purchase Orders Area. Salespeople are allowed access to this dialog.
The ID for the product will be automatically generated. If the user is a salesperson, the Salesperson field will be automatically set and the Customer field will be limited to customers assigned to the salesperson.
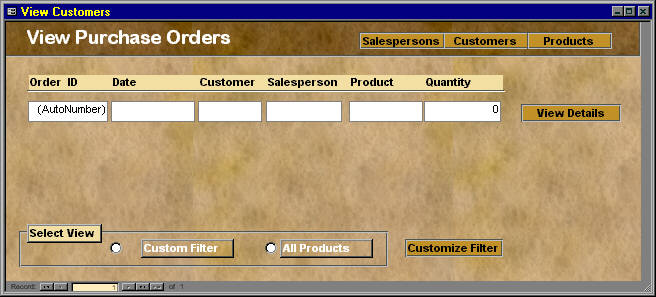
The View Product Details dialog displays all the purchase order's information. None of the fields are editable. Since this information is displayed in the work area, all the menu commands are still available. The Print and Print Preview menu items in the File menu will print a report containing all the details for the current purchase order. The Edit and Delete menu items in the Items menu will open the "Modify Purchase Order Dialog" and delete the purchase order respectively. The only button, "Back to Purchase Orders", returns the user to the Purchase Orders Area. Salespeople have access to this dialog.
For clarity, the security system and user access is summarized here. There are two levels of security: the Administrator level and the Salesperson level. Administrators have access to all functionality of the system, while Salespeople are restricted to certain operations. Any menu items or buttons that provide access to restricted operations will be greyed and inaccessible. Salespeople have the following restrictions:
In the Customer Area, all operations are accessible except view the master system list of customers.
In the Products Area, all operations are accessible except add, modify, and delete products
In the Purchase Orders Area, salespeople can only view purchase orders placed by themselves and cannot delete orders.
In the Salespeople Area, all operations are restricted.
In the Reports menu, only Order Report, Individual Customer Report, List of Products, Salesperson Customer Information, Salesperson Daily Route List are accessible.
To gain access to the system, a Login dialog will be displayed on system startup. A user is granted access to the system if the user successfully enters a correct user name and password. If the user is a Salesperson, the system will display the Customers Area with the daily route list. If the user is an Administrator, the system will return to the area the user was viewing in his or her last session. When the user is finished with the system, the user can select the Log out or Exit menu items from the File menu. The Log out command will log the user off the system and display the Login dialog. The Exit command will log the user off and shutdown the system.